Seat Adjustment/Seatbelt
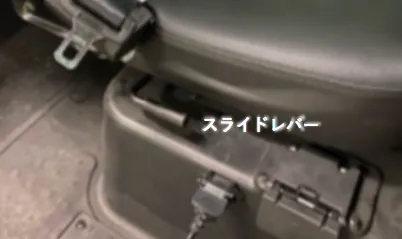
Slide Lever
Located above the charging connector on the right side
Move up and down to adjust the seat position forward and backward
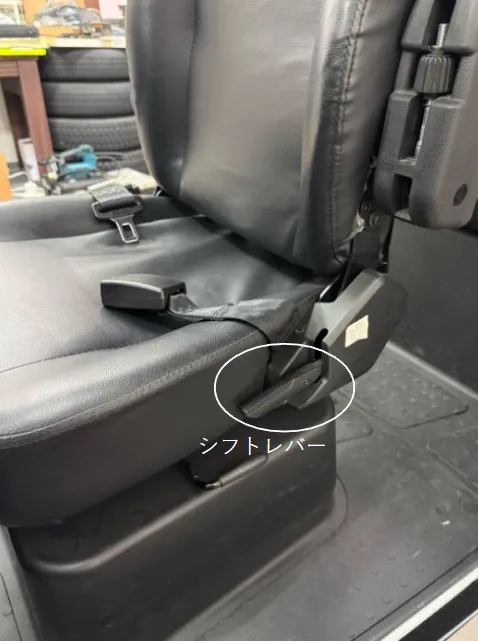
Seat Lever
Located on the left side
Move up and down to adjust the seat angle
※Some vehicle models have both levers on the left side
Power On
Insert key and turn left
The trick is to tilt it slightly to the left and look into the cylinder when inserting.
(When the power is off, the key cylinder is tilted upward to the left)
Be careful not to turn the key too hard to the left as this may engage the steering lock, which takes time to release
Shift Switch (DNR) Operation
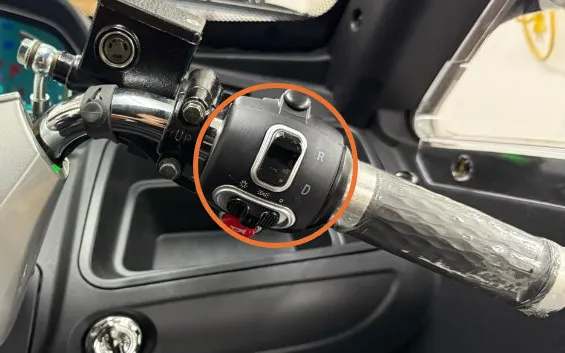
Shift Switch
Switch marked D, N, R on the right side of the steering wheel
- D…Drive (Forward)
- R…Reverse (Backward)
- N…Neutral (No movement)
Accelerator
Turn the right lever (next to the shift switch) toward you to move the vehicle forward
⚠ Sudden acceleration may cause abrupt start
⚠ Always release the side brake before starting
Brake
- Right Lever…Front wheel brake
- Left Lever…Rear wheel brake
(Using only the front brake continuously is dangerous)
Troubleshooting
If someone says the vehicle won't move, they may be unconsciously gripping the brake lever with their left hand while turning the accelerator.
To prevent accidental starts, this vehicle won't start if any brake is applied while turning the accelerator.
Check if the brake lever is stuck in the braking direction or if the brake is being unconsciously applied.
How to Apply Parking Brake
Parking Brake
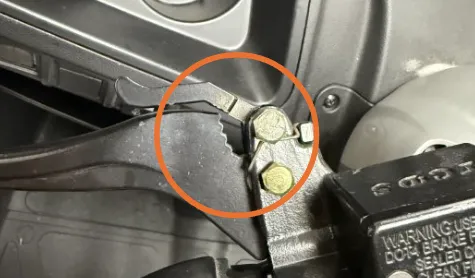
Before engaged
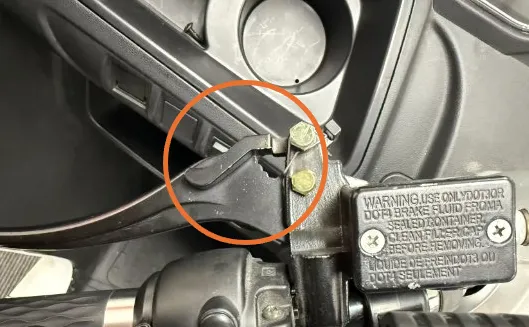
Engaged state
- Find the lever lock caliper
(Claw-like part at the base of the brake) - Grip the brake
- With the other hand, push the brake caliper and fit it into the grooves at the base
To release, grip the brake firmly again
Hill Start Method
- Fully grip the left brake
- Turn the accelerator to maximum
- Release the left brake while keeping the accelerator at maximum
Driving method video (see 2:22)
https://youtu.be/-M6gbCTfsqI?si=Qe12h4iv9B3QmFlJ&t=141Side Brake
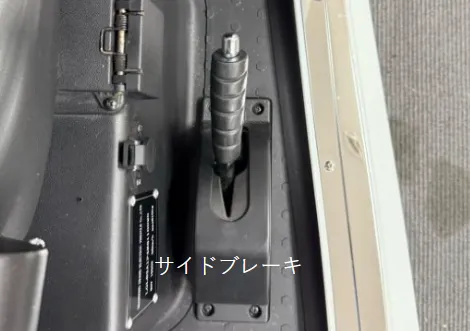
Press the silver button at the tip of the lever to lower it
Switches
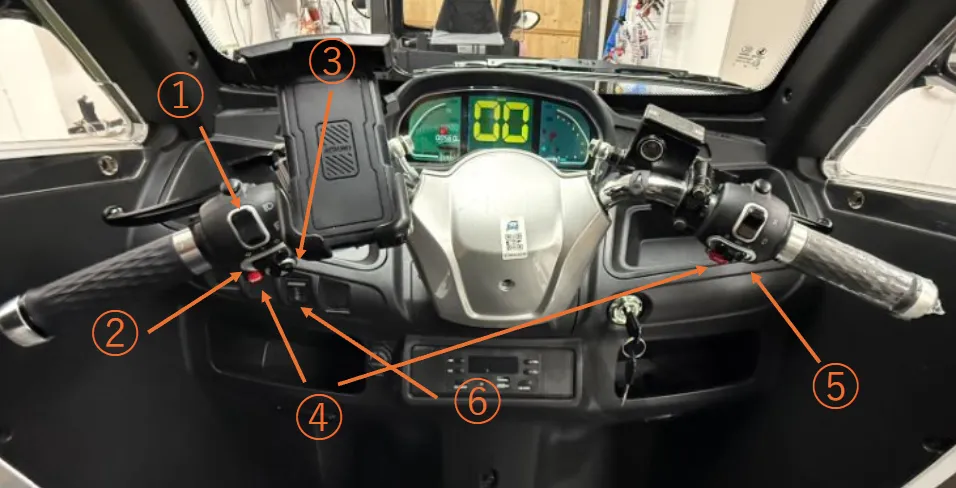
- Front light high/low beam switch
- Turn signal switch ※Unlike cars, it doesn't return automatically, so manually return it after turning
- Horn switch
- Hazard button
-
- ← Main light on
- | Position lamp on
- → Off
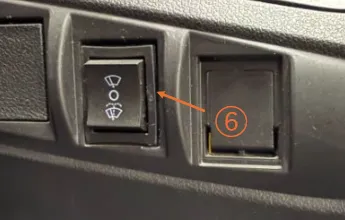
- Wiper switch
Digital Panel Guide

- Battery emergency meter ※Green, yellow, and red gauges light up from top to bottom
One green bar missing = 20% remaining - Travel speed
- Motor RPM meter (Not relevant to driving)
Mini Meter Showing Accurate Battery Level
(Located on the wall to the right of the driver's seat)
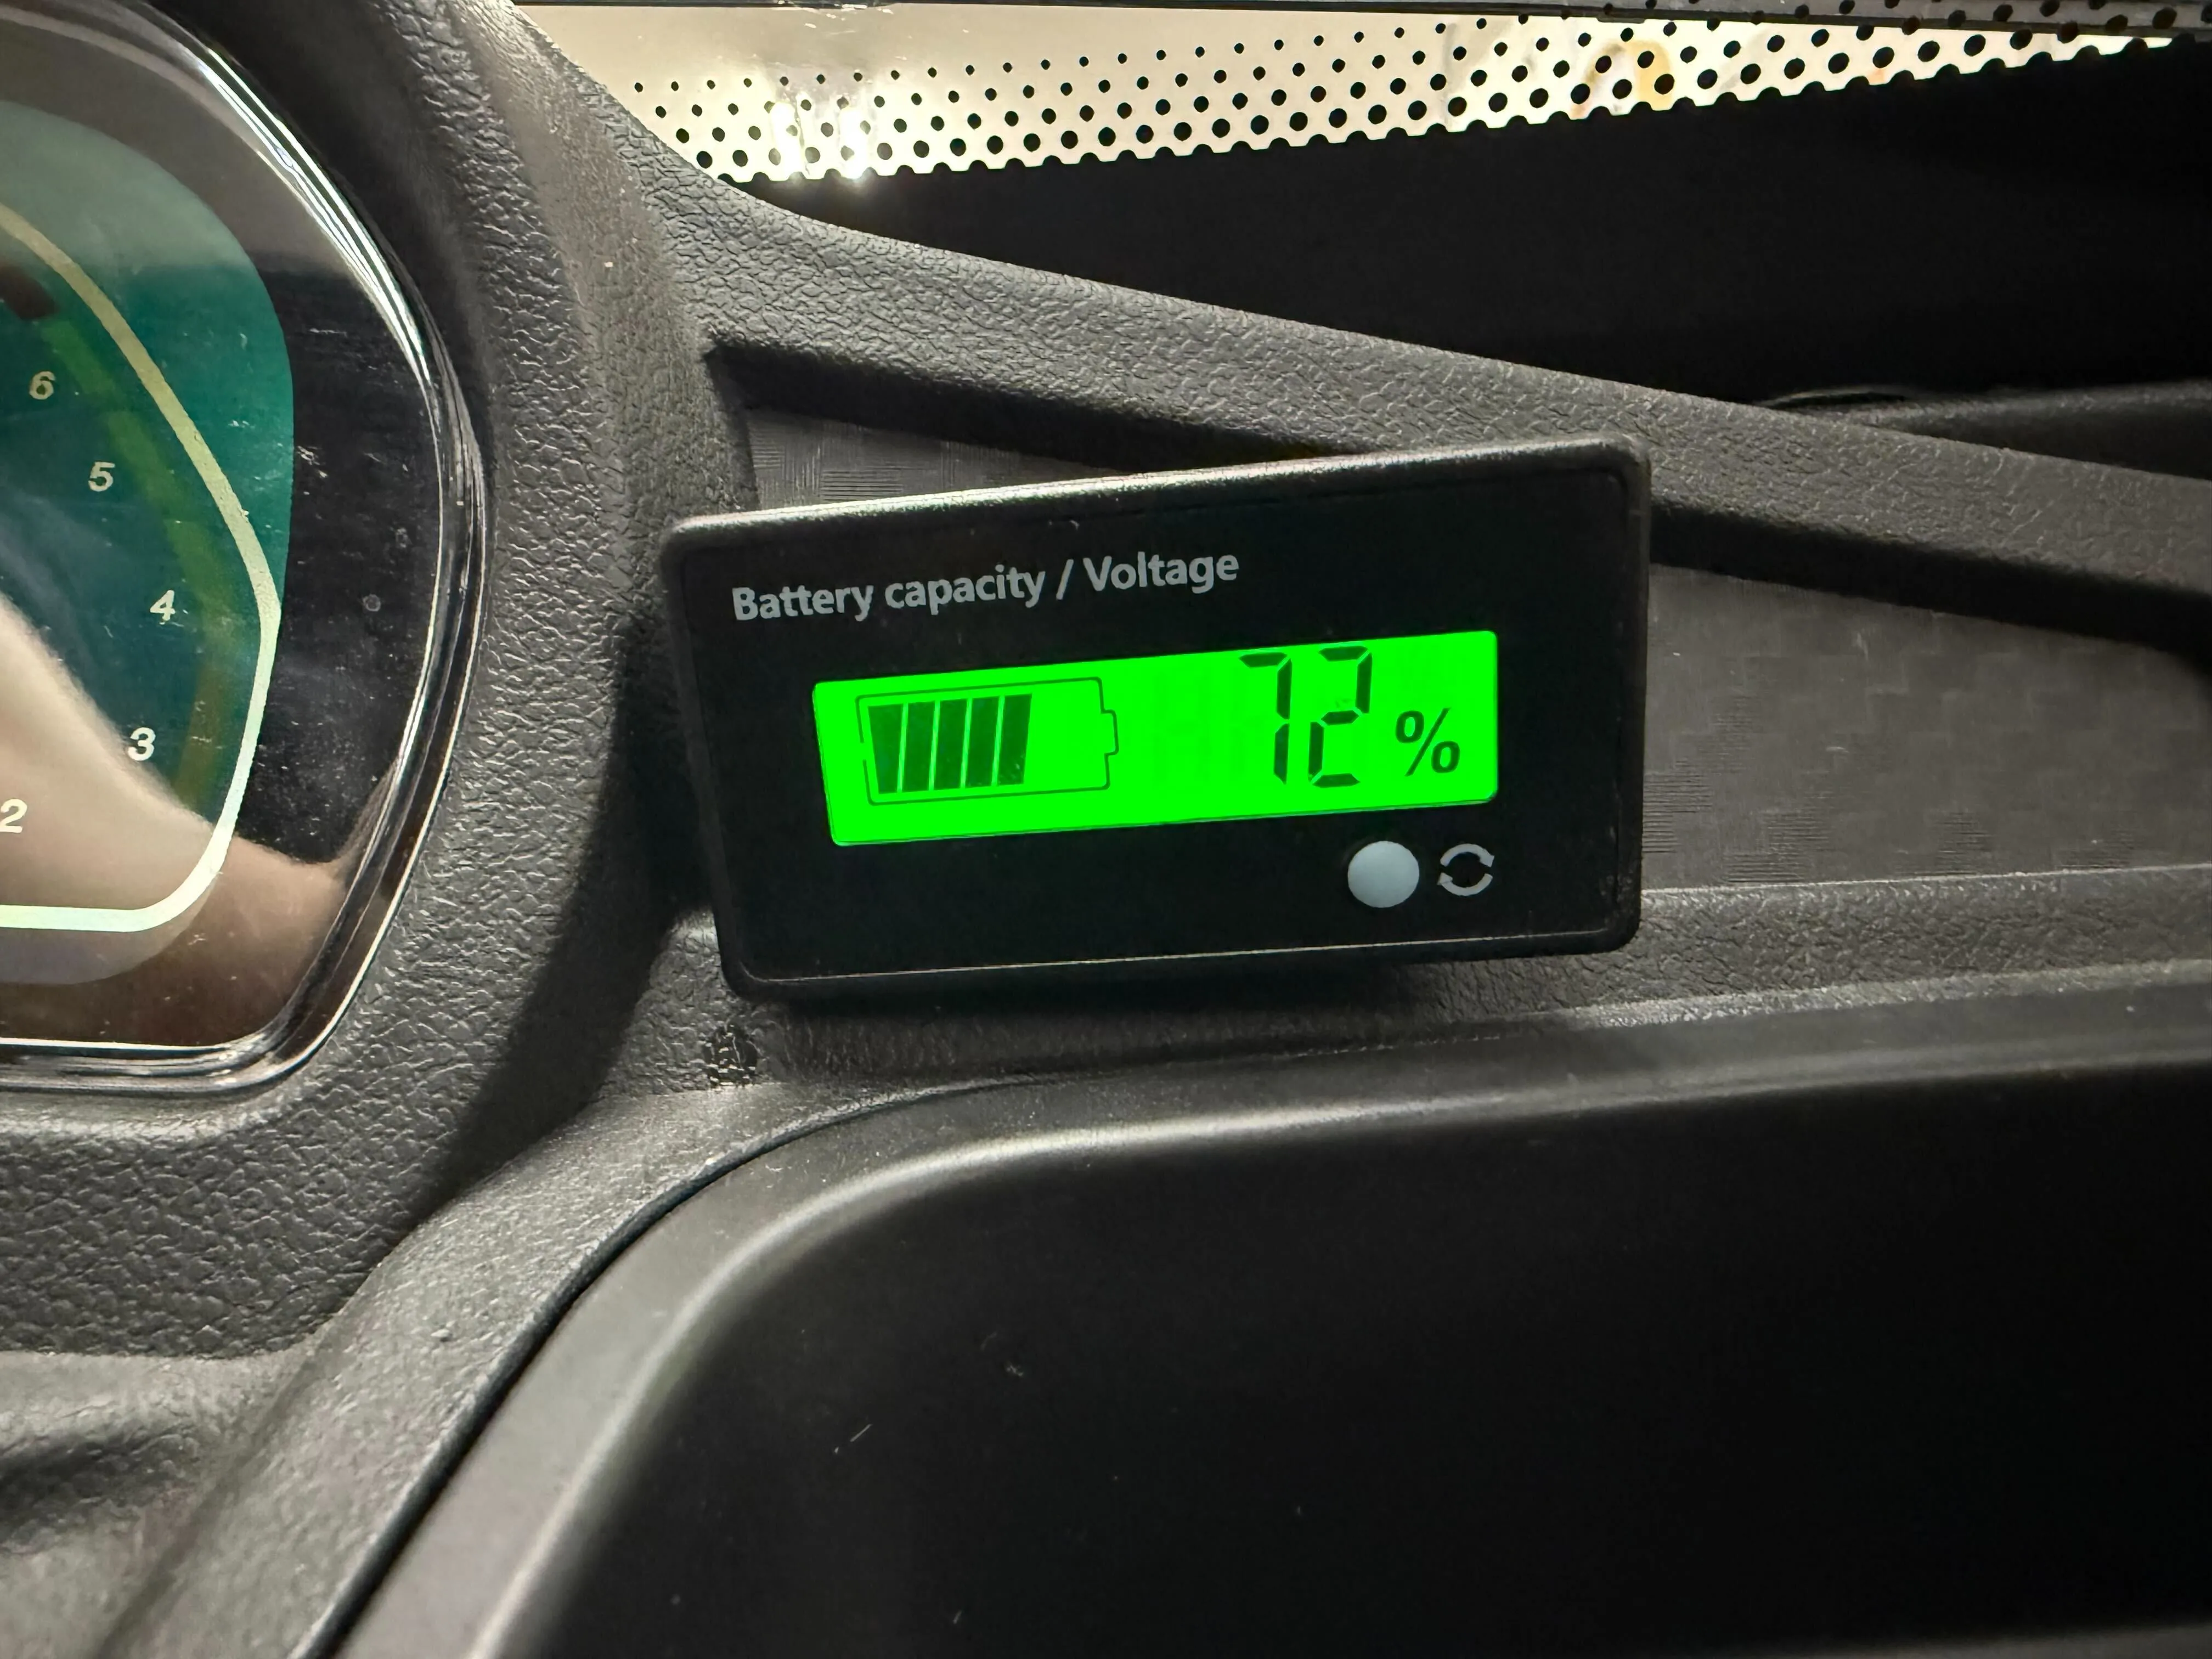
Press the white button next to the arrow mark to check the remaining battery
⚠ If the gas gauge to the left of the READY lamp lights up, it means 3% remaining, approximately 2-3km of range left
Move the vehicle to a safe location and inform the tow service that battery depletion has occurred
Driving Precautions
- Drive slowly and carefully through curves, and turn at intersections at 15km/h or less※This vehicle has a 3-wheel structure, making it vulnerable to sudden steering and acceleration
※Sudden steering or entering corners at excessive speed may cause rollover and serious injury in the worst case - Learn the hill start method beforehand / Use both brakes in a balanced manner※Whether on a downhill or not, don't use only one brake continuously. Use them alternately or simultaneously in a balanced manner
- Be cautious of battery depletion when travel distance exceeds 30km (for 40km model)※If the route clearly exceeds the vehicle's range, change your route
Vehicle Specifications
| Vehicle Weight | 260 kg (including battery) |
| Vehicle Classification | Light motorcycle with sidecar |
| Size | Length×Width×Height 2375mm×1210mm×1600mm |
| Maximum Occupancy | 3 people |
| Range per Charge | 40km ※Range varies by model |
| Maximum Speed | 50km/h |